
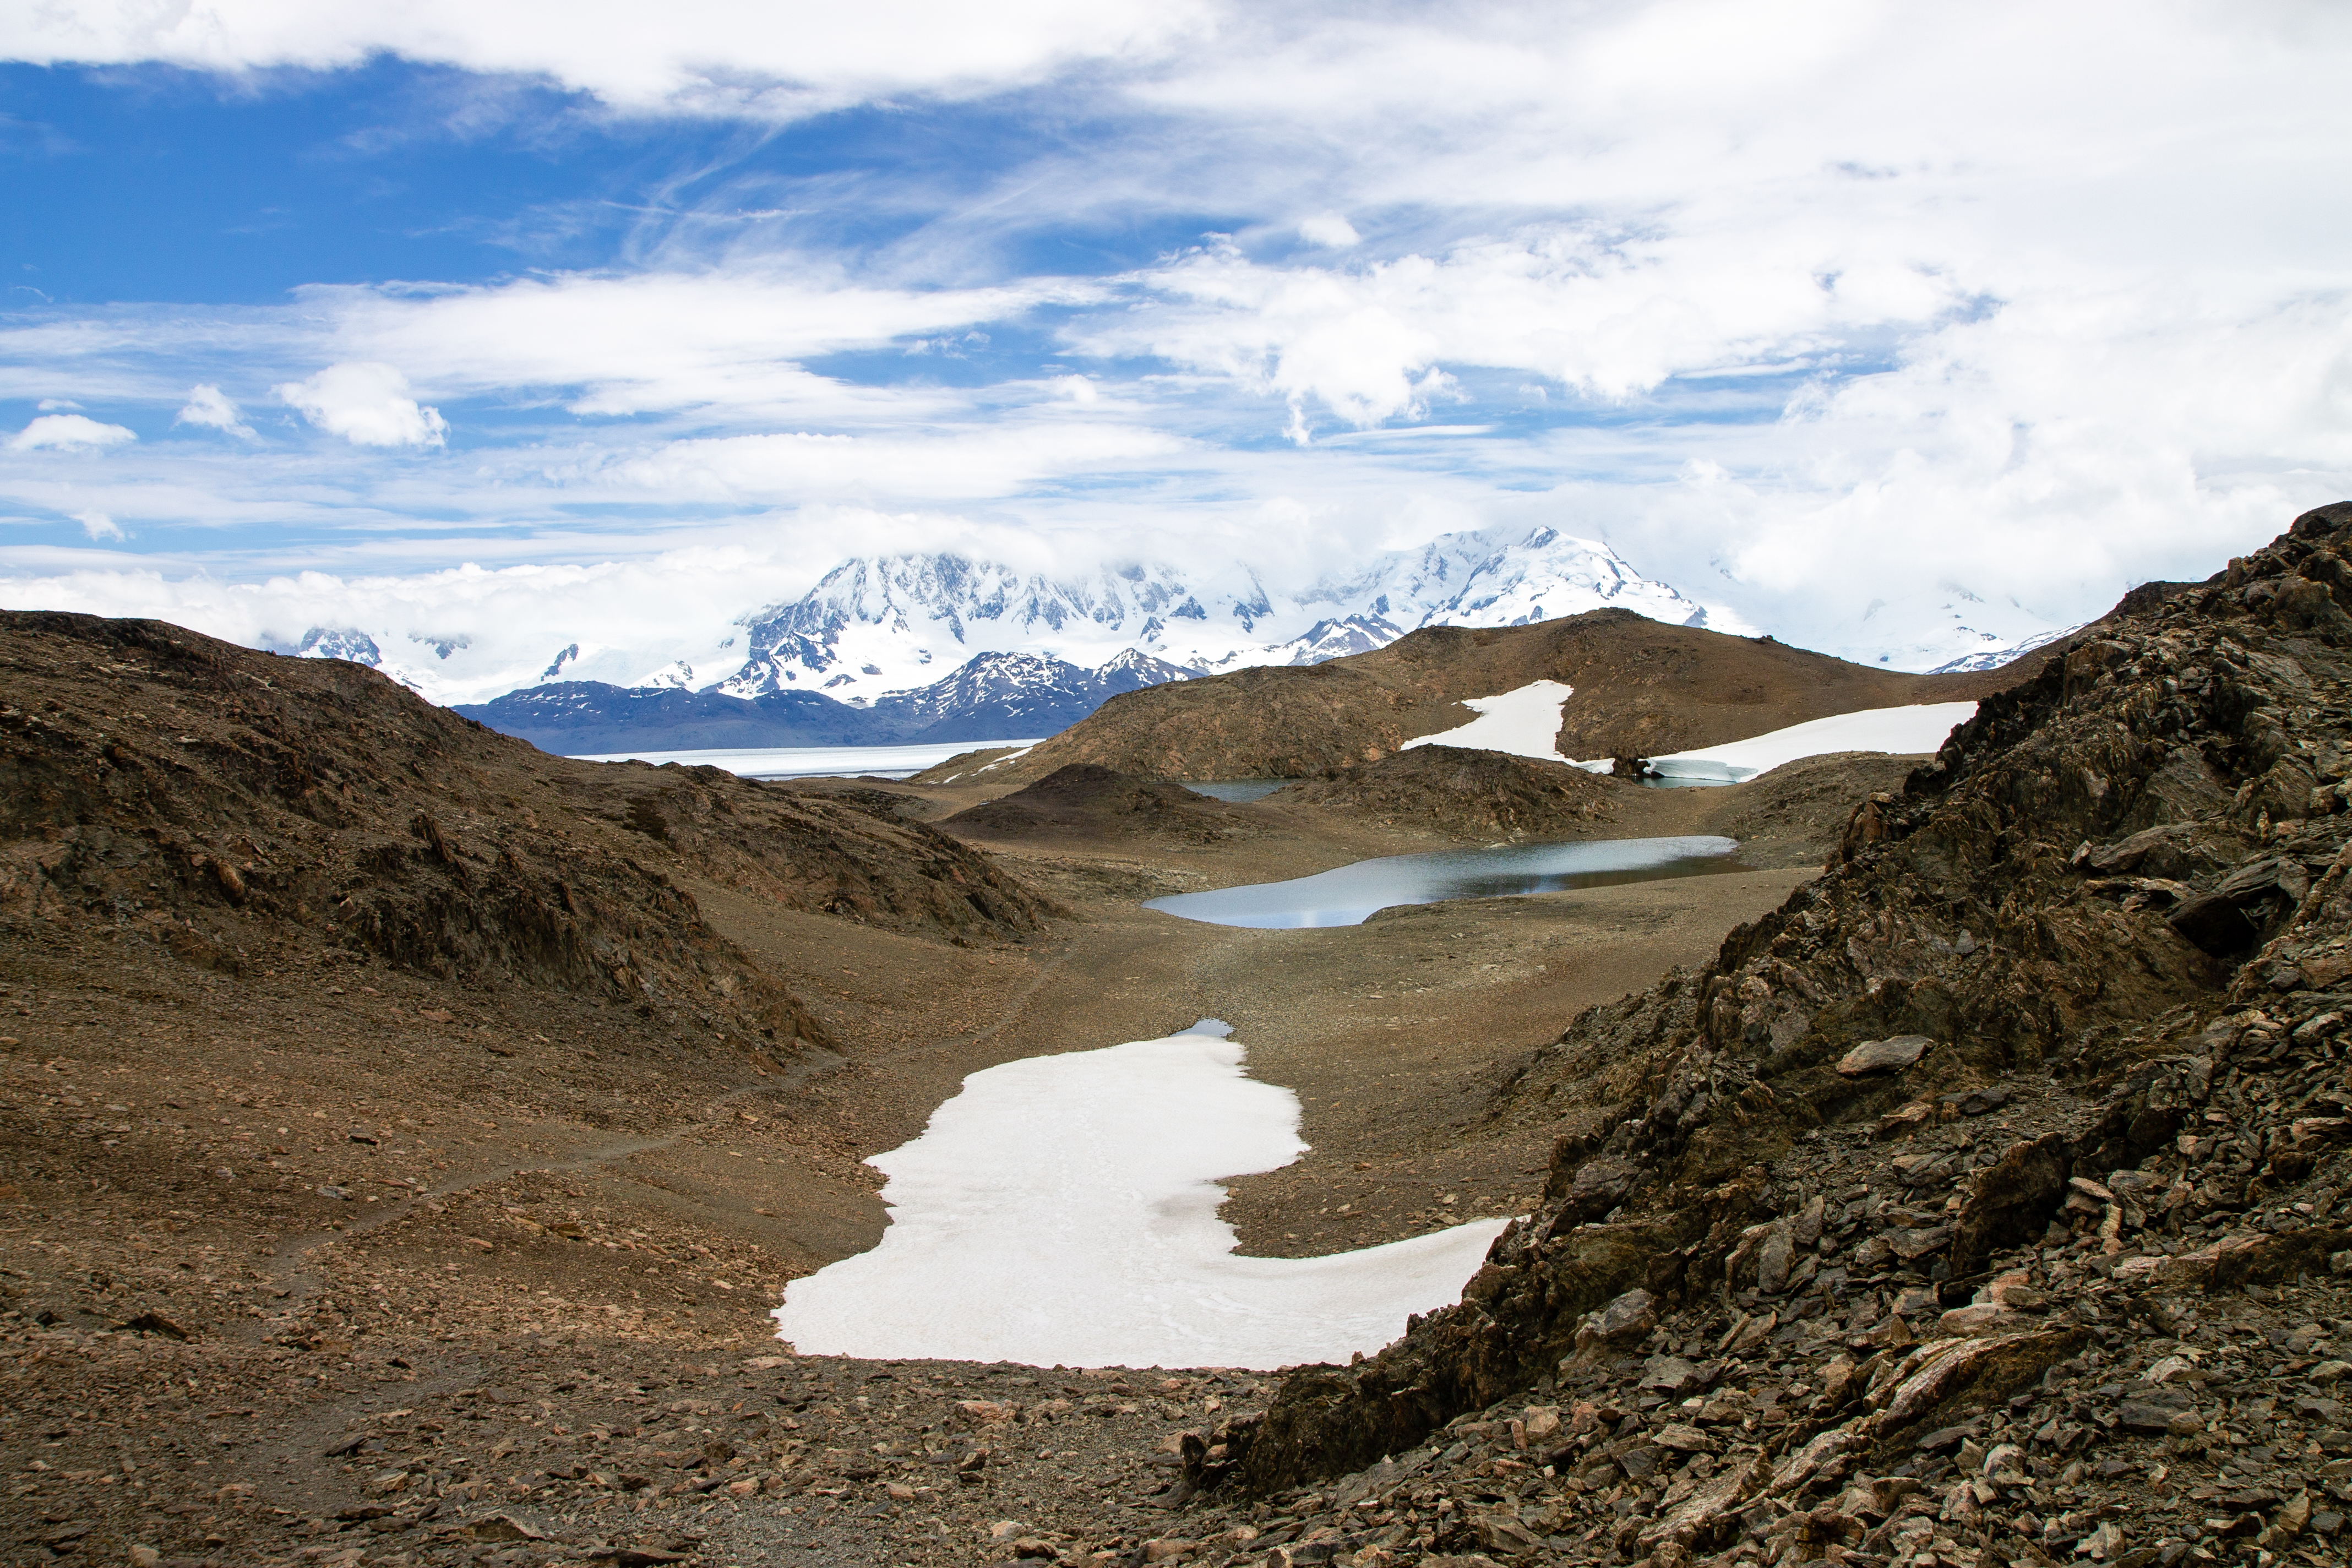
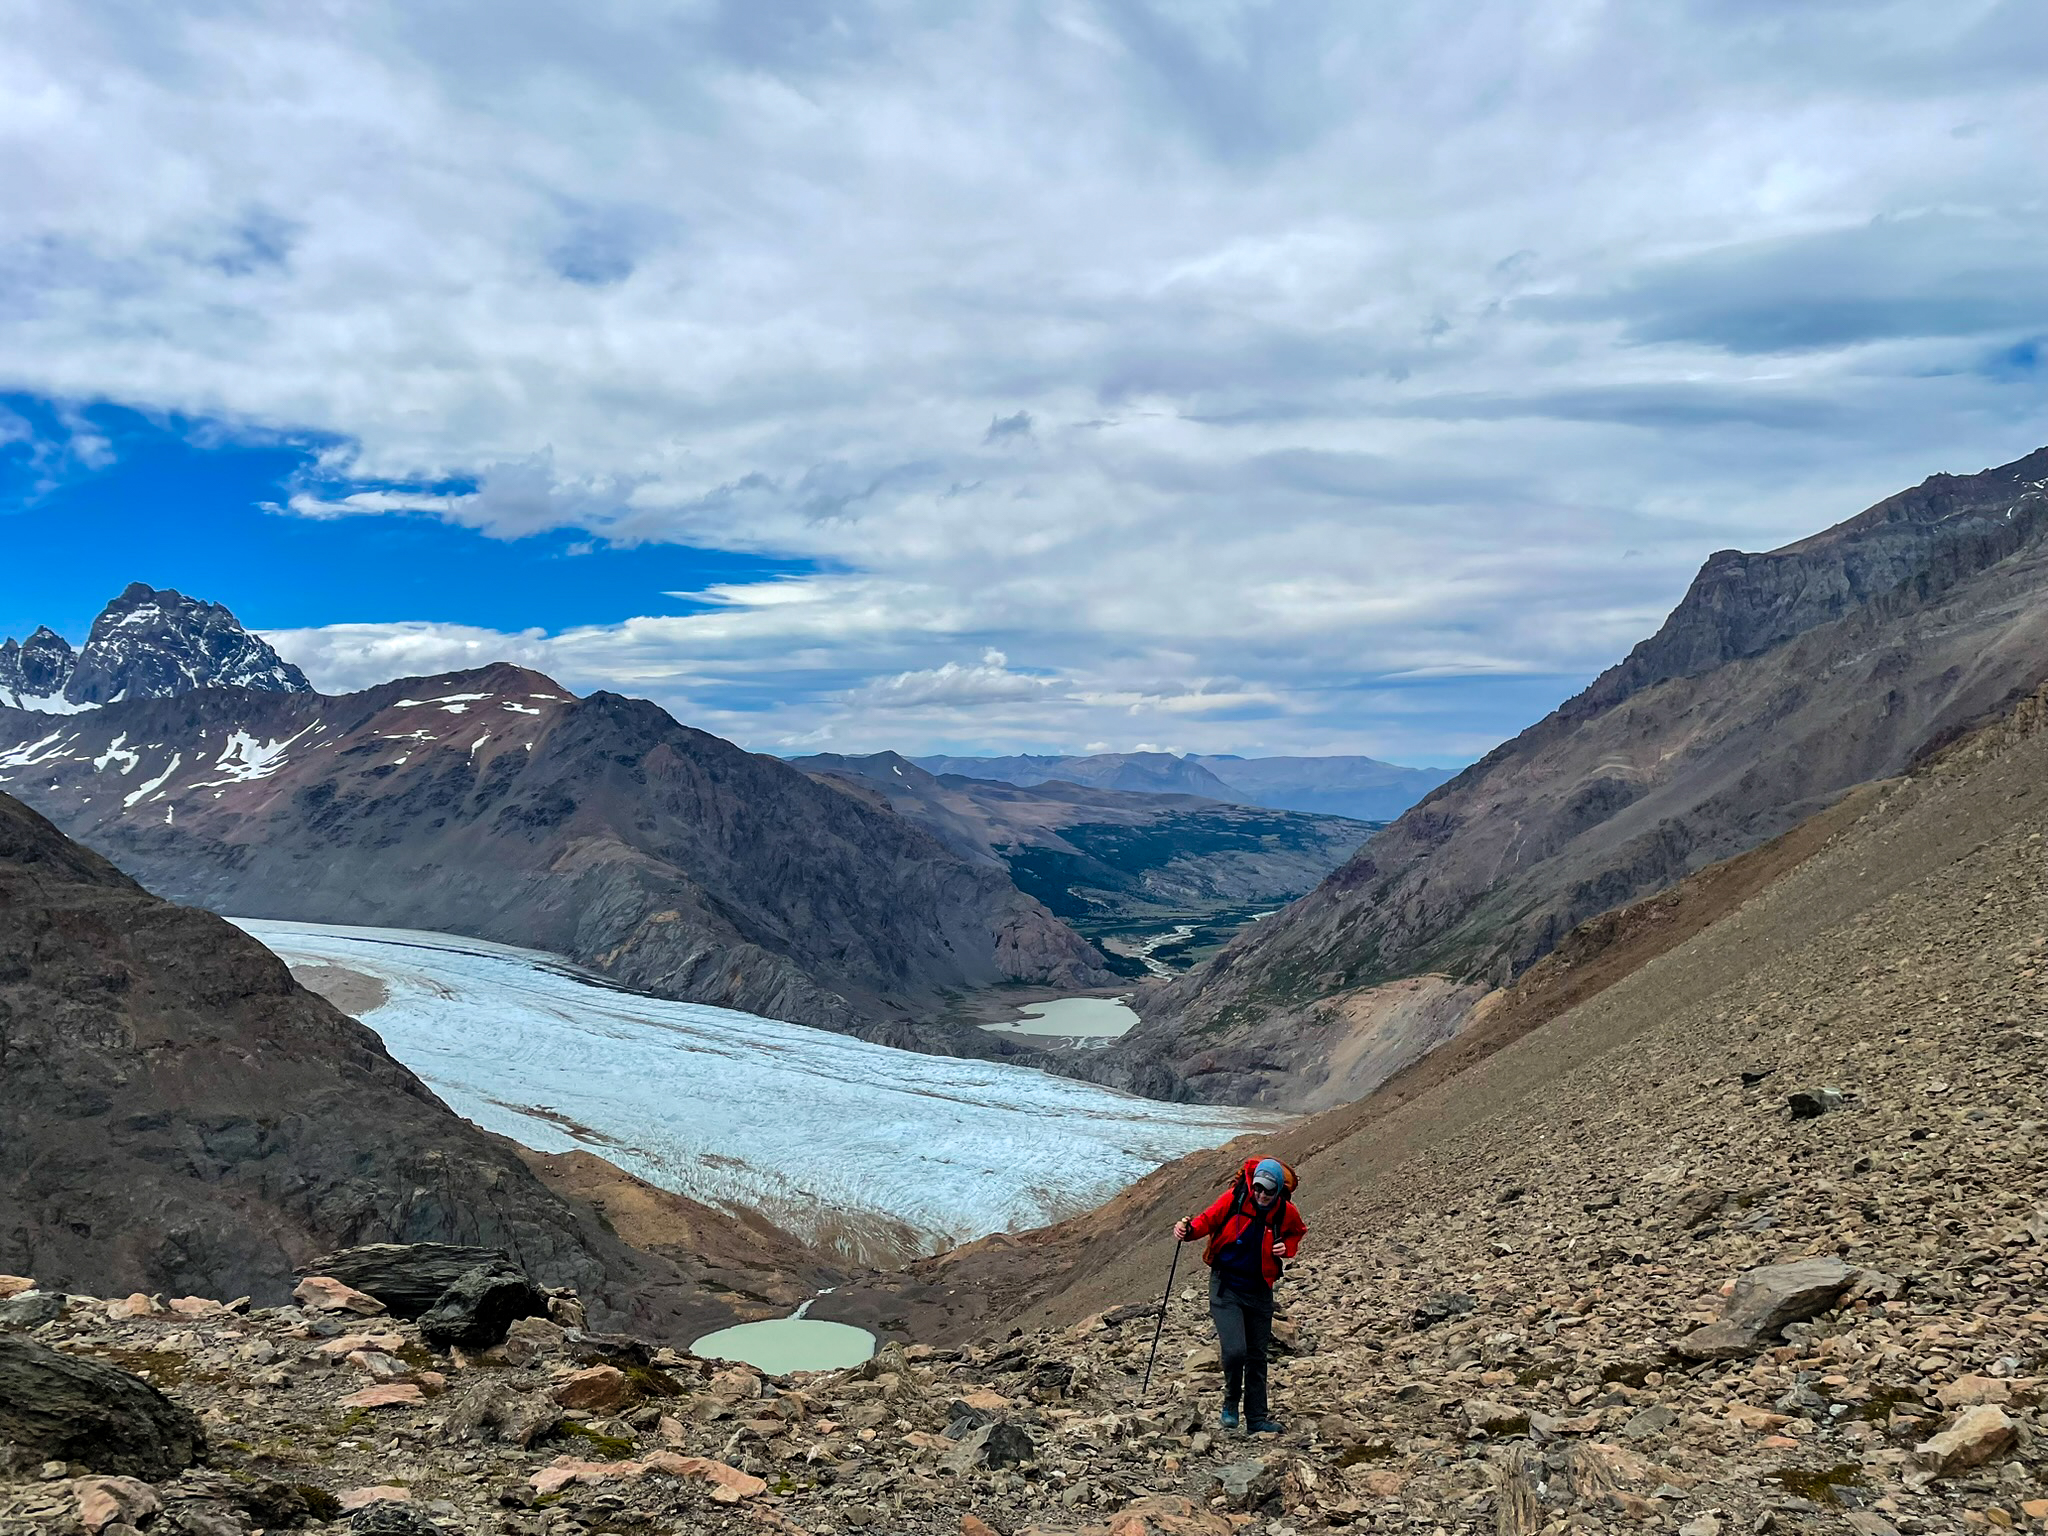
Over the top and there it is: the Southern Patagonia Ice Field, the second-largest ice sheet in the world outside of the polar regions. Ice moving over ice creates what looks like roads, curving gently, swooping as far as I can see back into the snow-covered mountains. On this day, I crossed over a river using a Tyrolean traverse; I had descended scree to walk on a glacier and then ascended the scree, up up up to this view. The next day, I would walk above the ice, pushed forward by an increasingly strong wind over a pass and then down a ridiculously steep and dusty descent to a campsite nestled in the woods beside a bay of icebergs.
The Huemul Circuit is (usually) a four-day trek, totaling around 40 miles (64 kilometers), that begins in El Chaltén, Argentina. It includes two passes, two Tyrolean traverses, walking on a glacier, infamous Patagonian wind, and massive, beautiful landscapes. For experienced backpackers, this is truly an incredible adventure.
The following provides a description of the hike by day, photos, and tidbits of advice.
Warning! This trek is only suitable for experienced backpackers with good fitness. I cannot emphasize this enough. This hike is difficult with very technical sections. It also requires good judgement about navigating very tough terrain and possibly poor weather. As beautiful as this hike is, do not attempt it unless you have ample experience. Otherwise, you could die.
Information below is based on my experience in December 2022 when I did this trek with my partner.
Day 1: El Chaltén to Laguna Toro
10 miles, 2500 feet of elevation gain and 1600 feet of loss


The hike begins with a moderate ascent out of El Chaltén. It’s very quickly apparent that this is going to be an adventure with amazing vistas as you’ll get increasingly better views of Fitz Roy and the Chaltén range. After climbing through meadows and forest, you’ll be treated to Cerro Huemul looming in front of you as you gradually descend into Toro Valley. You’ll walk through the valley and come out at Laguna Toro and the campsite.
This campsite was by far the most crowded one of our trip. Even so, it wasn’t too bad and it was possible to get a good spot nestled in a curve of a branch wall that people have built up over time. These walls serve a purpose: the wind in Patagonia is no joke. Laguna Toro campsite is situated rather close to a river, so water access is not an issue. In fact, there are ample opportunities to fill up throughout the trek.
Previous reports online said there was a toilet at this campsite. However, in December 2022, there was not—what we suspect was the toilet shed was on its side. Please be responsible: go far from the campsite and from water and bury your shit, including your toilet paper. There are no toilets at the other campsites, either, so seriously—be prepared and be responsible.
Day 2: Laguna Toro to Refugio Paso del Viento
8 miles, 3500 feet of elevation gain and 2700 feet of loss


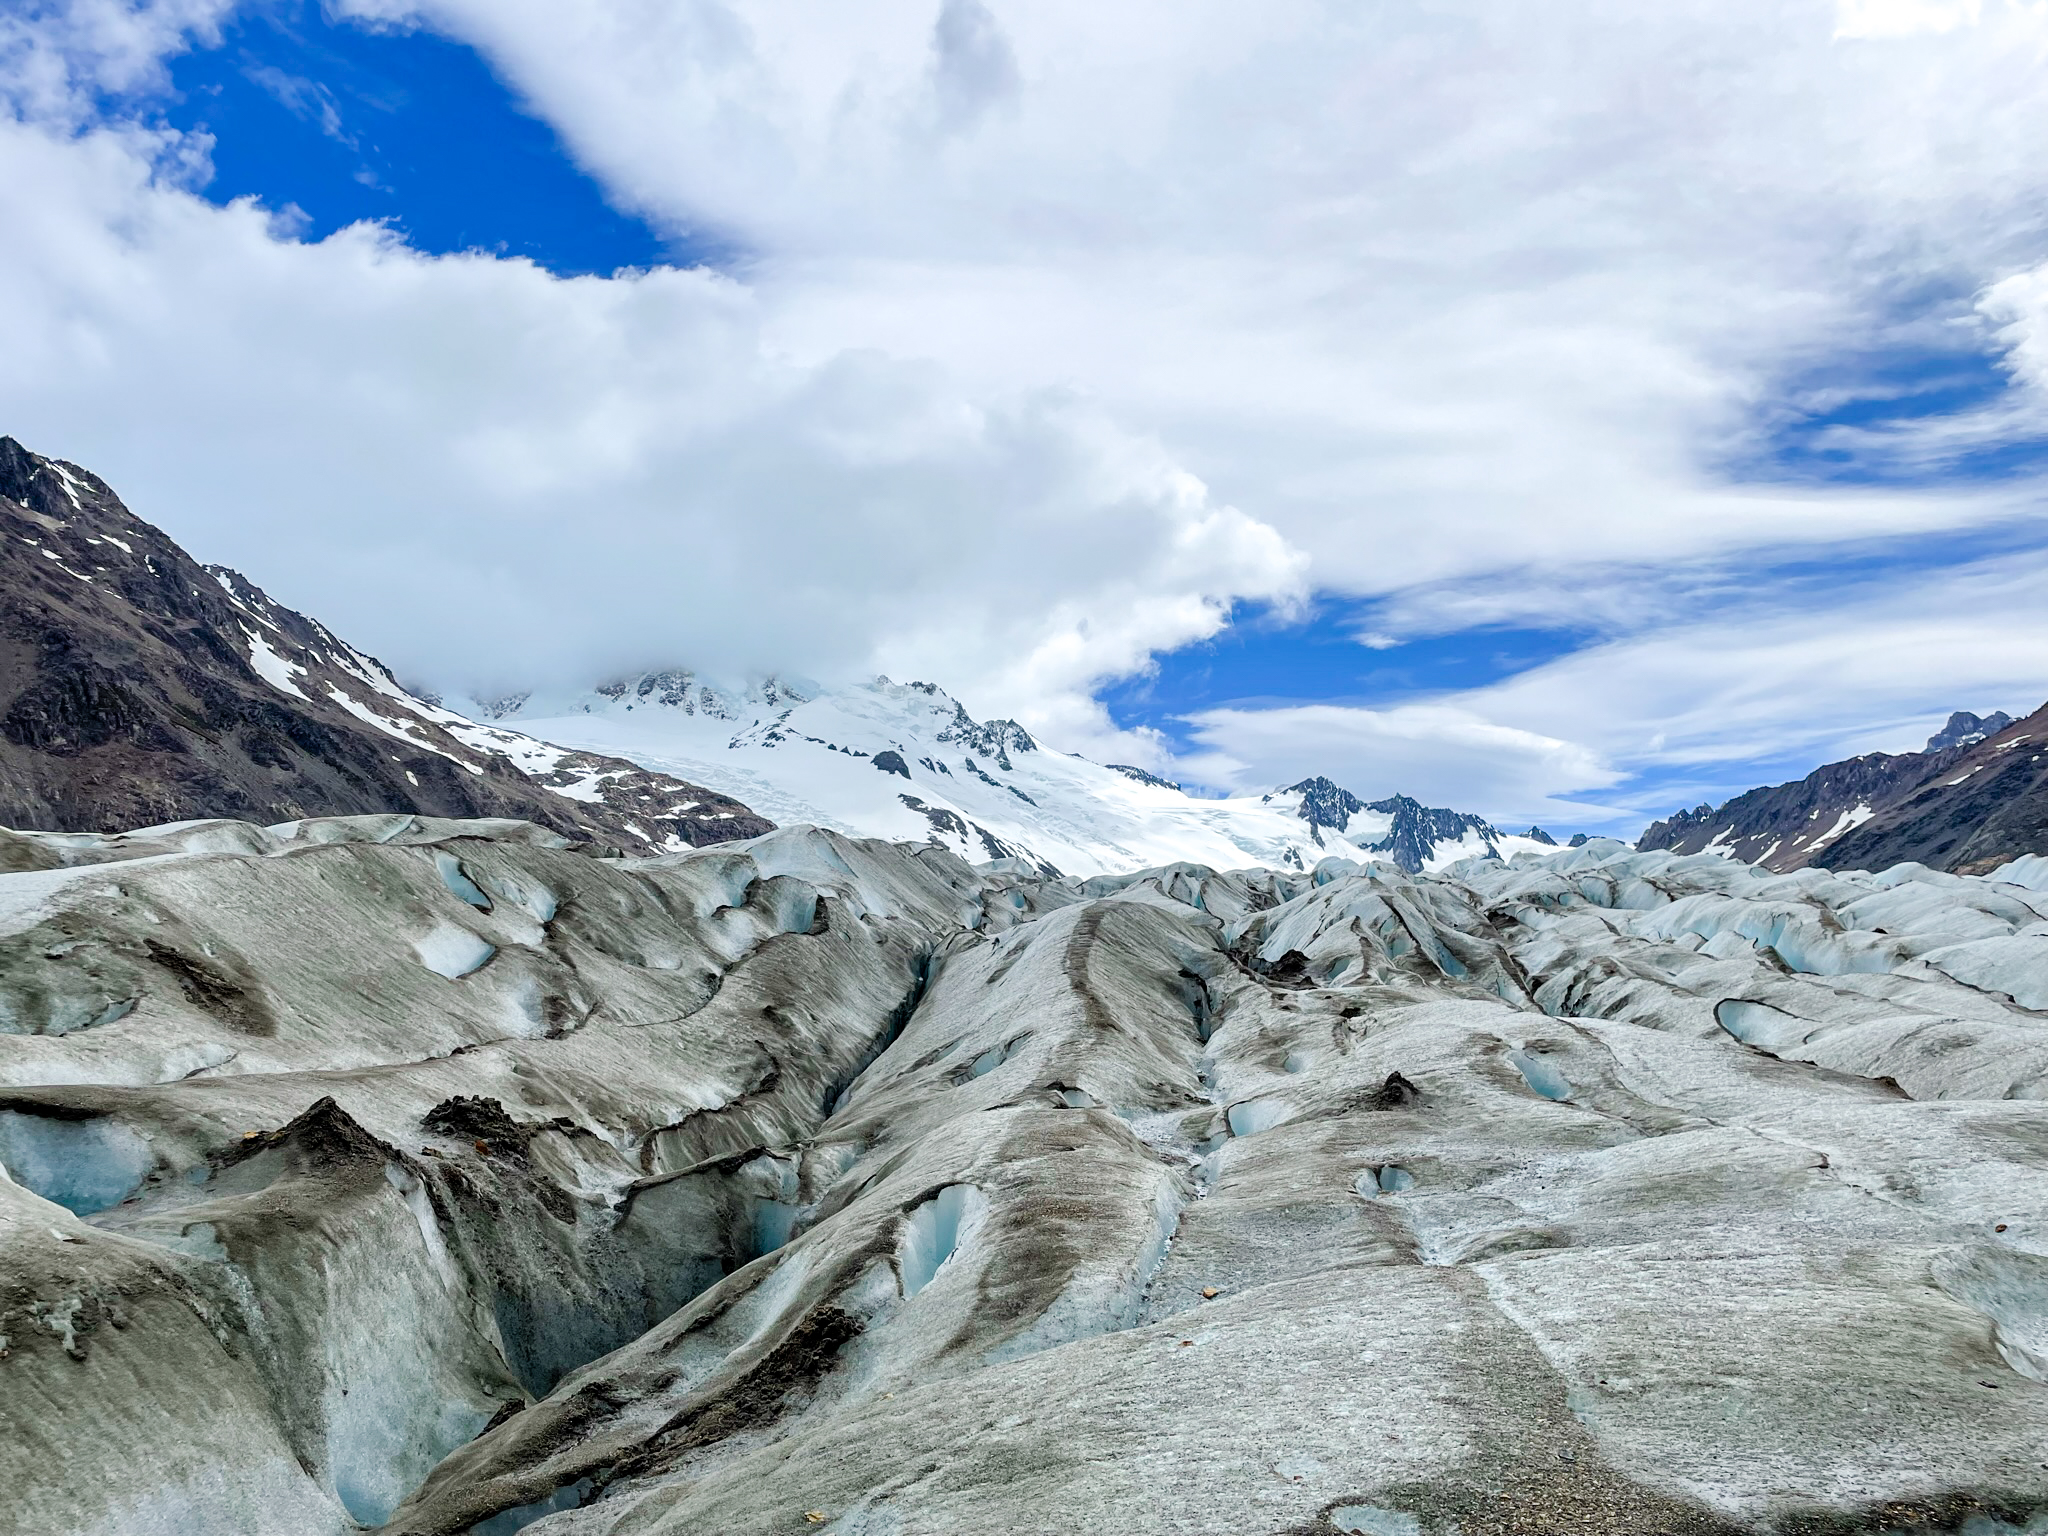


Here’s where things get serious and wayfinding more difficult. To start your hike, you’ll gradually ascend along the river, which gets bound in by rocks and wilder. This is why you’ll want to use the Tyrolean traverse. There are online reports of people crossing further down or upstream, but we couldn’t see where; this would also only be possible when the water isn’t running high. As scary as I found the Tyrolean traverse, this was probably the best option! You have to pull yourself slightly uphill so it’s tough on the arms. You’ll also end on a rock face so make sure you’re well-settled before detaching fully from the cable. Be very careful and make sure you know how to use the traverse safely. After making the crossing, you’ll be treated to remarkable views and a sketchy scree trail as you descend to Glaciar Túnel. The glacier is, in the words of the ranger at the station in El Chaltén, “muy sucio” (very dirty), so you don’t need crampons or other special equipment to walk on it. In fact, walking on the side of the glacier is a better option than along the scree slope. However, the glacier has its pits and ripples, so footing still isn’t easy.
Getting off and away from the glacier to begin the climb to Paso del Viento was quite difficult. Apparently, there was a better trail, but we could see where it had collapsed, leaving us to scramble up the scree field to access the proper trail; this did not feel good. The trail itself is a tough climb up to the pass, but once you get there and see the Southern Patagonia Ice Field, it’s worth the effort! As the name suggests, beware of the wind.
We saw one spot for a tent just below the pass but recommend descending to the refugio where there are more campsites nestled among rock walls by a small lake. The descent down from the pass is steep and rocky before levelling out in a mossy, watery area. The trail isn’t well-marked (indeed, there are multiple paths), but follow the river to reach the refugio. The campsite is very pleasant: we saw a rabbit munching on some grass and were able to shelter from wind in the rock walls and in the refugio building. There were only a handful of other groups at this campsite as well as the next.

Day 3: Refugio Paso del Viento to Bahia de Los Témpanos
9 miles, 2800 feet of elevation gain and 5100 feet of loss

We started early in the day since we knew the wind would pick up. The wind in Patagonia is unlike wind I have experienced elsewhere: it can be very strong and come in gusts that you can hear and see approaching before they knock into you.
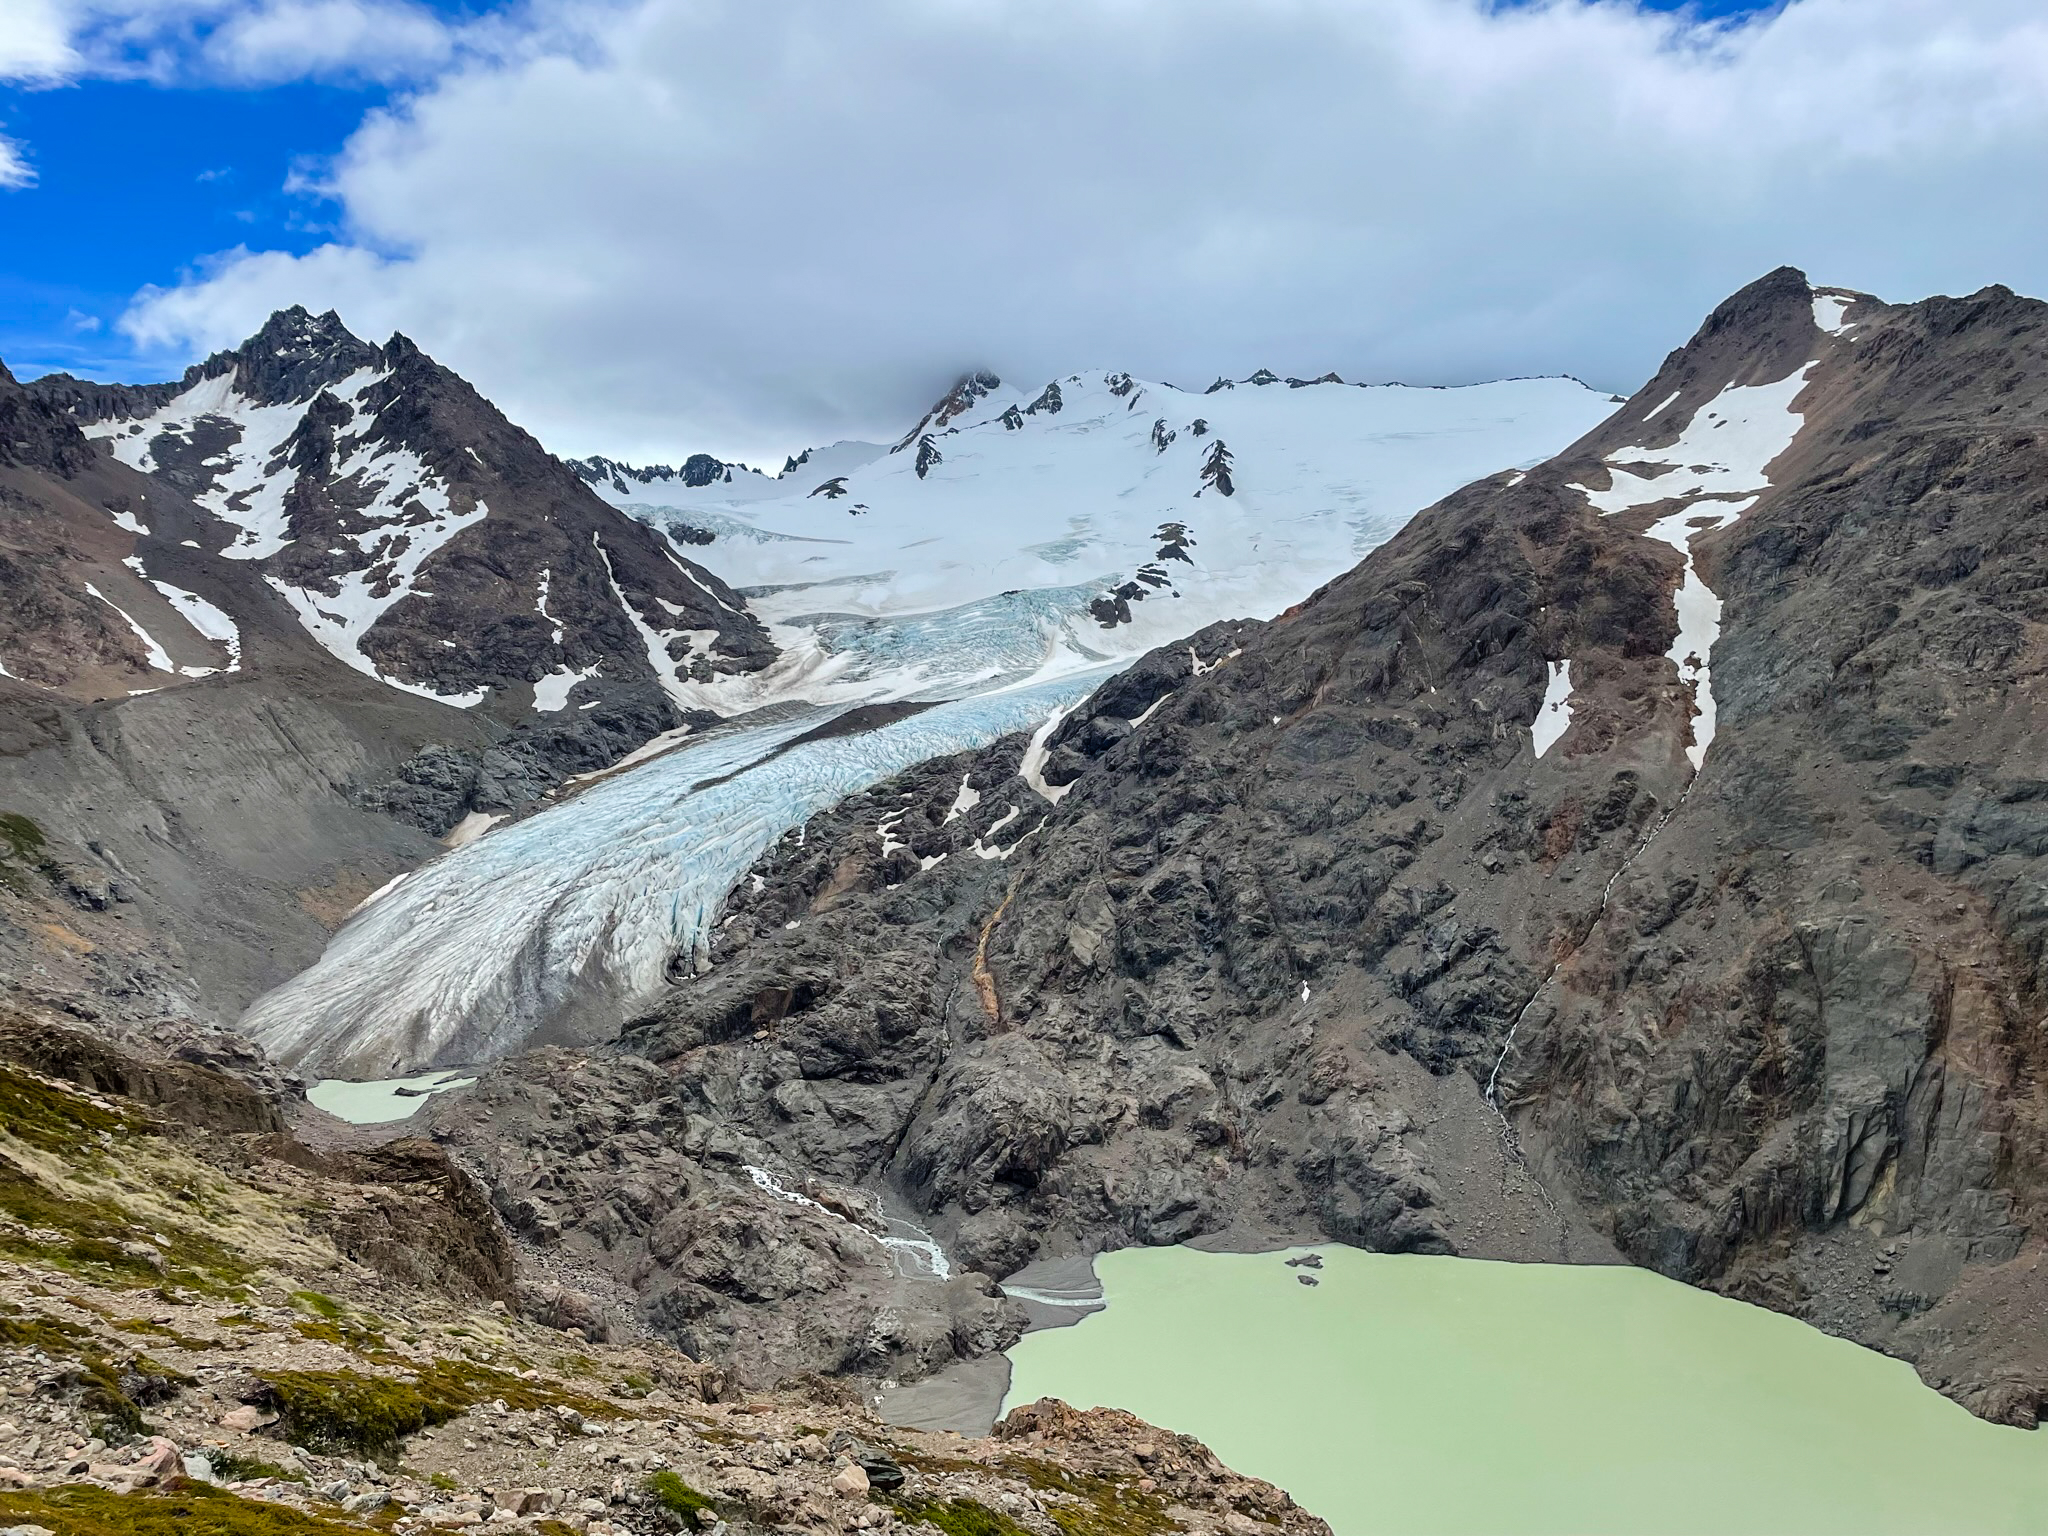
The hike begins rather smoothly, following the hillside with views of the ice field and Glaciar Viedma. It becomes a bit tougher with a few areas of short, but steep, scrambles but overall, the ascent to Paso Huemul is not challenging unless you have winds, which we did. Luckily, the winds came from behind so our packs were pelted with graupel rather than our faces and we were being pushed uphill. The wind was strong enough to knock me over. Luckily, the trail over the pass is not narrow, nor on a cliff so I was able to let the wind push me as I ran (easier than walking, which would have required resistance!) from boulder to boulder to reach the top.
Immediately after crossing over the pass, the wind calmed down for us. We were treated to a stunning view of Lago Viedma and Bahia de Los Témpanos (Bay of the Icebergs) far below. The descent starts off decently but don’t be fooled: it gets difficult and dangerous. You’ll start among trees (there are some campsites up here if needed) where any steep spots are more easily managed with the possibility of grabbing onto trunks and branches. However, the trail rapidly becomes eroded and deteriorates, becoming dusty and very slippery. The trees recede, leaving nothing to hold onto for stretches of trail. It is extremely steep with little to no traction in areas. At times we slid on our butts—sometimes purposefully, and sometimes on accident. There were two spots where people had strung ropes for particularly steep sections down rock faces. Be sure to check the ropes before using them and don’t rely on them completely! This part of the hike was frankly the scariest for me. It took us about two hours to go one mile—it’s that steep and difficult.
Eventually, the horrifying part of the trail ends, and the descent becomes reasonable. There are two places to camp: we chose to turn off to Bahia de Los Témpanos. This is perhaps the most stunning campsite I have ever stayed at: it is situated by a bay that is full of icebergs that have calved off Glaciar Viedma, which is still visible. The campsite is somewhat sheltered within the trees, but with full view of the icebergs, which are fascinating to watch as they break and flip.
Another camping option is to continue slightly further to Bahia de Hornos, which is apparently less crowded but more exposed.

Day 4: Bahia de Los Témpanos to Bahia Túnel
10.5 miles, 1800 feet of elevation gain and 1800 feet of loss


This last day of the circuit is the easiest. There is a bit of elevation gain, but it’s in rolling hills on a much easier trail. There is a longer stretch without water, so start off full. You’ll begin walking in grassy fields where we saw many large rabbits having their morning munch. The wayfinding here is a bit more difficult due to cow paths, so keep an eye on your GPS track and don’t follow suspiciously disused trails. There are occasional trail markings of sticks with red tips.
After rolling hills, you’ll reach the second Tyrolean traverse which is longer but less intimidating than the first. It is slightly downhill so you’ll be able to zip along at first with no effort. It crosses Rio Túnel, the same river the first Tyrolean traverse crossed!
From here, it’s a relatively short walk to Bahia Túnel, the official finishing point. It is possible to hitch a ride from here back to El Chaltén if you’re lucky. There is a ferry dock, though the boat is apparently no longer running. We sat around and had a snack while we waited to see if anyone would show up; eventually, some other tourists did in their car. However, when we were there, it seemed like a rather unpopular spot so you may end up hiking several miles more to Estancia La Quinta to call a taxi, or the full distance back to El Chaltén.
Packing
This is not a comprehensive list! If you’re going to attempt this trek, you should know what to bring. However, a few tips follow…
- Hiking poles. I actually dislike using poles generally, but I found myself borrowing one of my partner’s for the really steep descents for added balance.
- Harness, carabiners (one steel, one aluminum), and rope for the Tyrolean traverses. You can rent these in town, but it may be almost as cheap to buy and bring your own and they’ll likely be lighter and of higher quality. Additionally, a couple we met on the trek said they had trouble finding a place that had some on hand.
- Gear for all weather. It will likely be summer (in the southern hemisphere) when you do this, but that doesn’t mean it won’t be cold, windy, or rainy.
- Pants with tough butt fabric, or pants you don’t mind getting ripped. There’s a good chance you’ll do some butt sliding on day 3’s big descent. I wasn’t the only person out there who got a little rip!
- Topographic map. You’ll need this to get a permit for the hike. Plus, it’s good to have in case your electronics fail. You can buy one in town.
- Empanadas. Bring these for lunch on the first day!
Other Notes
In order to do this hike, you’ll have to get a permit at the ranger station in El Chaltén (which is right by the trailhead). They’ll have you fill out an online form, check that you have the required equipment for the Tyrolean traverses and a map, and show you a short presentation on the hike. They also somewhat try to discourage folks and emphasize how difficult this circuit can be—and they’re not wrong to, honestly.
It’s important to know the weather forecast before you start. If the weather will be bad, especially for days 2 and 3, consider changing dates. We knew there might be some moderate winds in the afternoon on our third day, so we decided to bring enough food in case we needed to stay an extra night and wait to attempt Paso Huemul. We ended up going for it and leaving very early in the morning to stay ahead of the weather, but had it been any worse, we may have needed to wait.
Once you’re back, you’ll need to notify the ranger station that you finished the hike. You can do this at the ranger station or via email.
Also, this is one of the coolest hikes I have done.


Share Your Thoughts